Thursday, April 30, 2020

The Village Blog #12


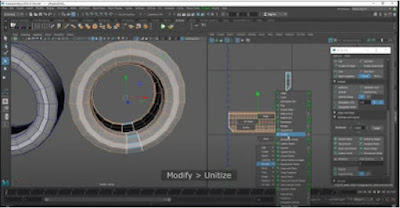
For this week I mainly focused on cleaning up the UVs for my second house. The process of cleaning up the UVs for the house was quite simple but once again tedious when it comes to the windows. Regardless, I am definitely happy with the clean UVs that I have gotten by going through the repetitive process. 

Front Wall

Left Side Wall

Back Wall

Back Wall 2

Front Wall 2

Small Section of House

I have taken the advice of a fellow classmate and re-created the UVs for the fence. After developing a new style of making UVs for my model this became a simple process to do. 

Making the UVs for the rooftop on the triangles on the side of the houses was also a easy task to accomplish. With the amount of time left in the semester I have come to a realization that depending on how busy it gets with the remaining time that is left I may have to scratch the third house and focus on texturing my houses and putting them in a Unity scene. 


Sunday, April 26, 2020

Castle on Wheels Blog #4

Continuing on from my last sprint, I managed to add the castle path to my level as well as the enemy placements. This took quite a while since I wanted to ensure that the castle path was smooth so the castle wouldn't look like it was turning corners too sharply. I had to modify my enemy placements compared to my last level since I only had a tiny bit of room to work since I have shrunk the terrain. 

After finishing the enemy placements and the path I have then added the nav mesh to my level. It was a simple process to do since I was already taught the steps to implement it on my last level. 

Eventually when our group reached Sprint 6, the level designers were on stand by as the programmers were implementing the code needed to have our levels work. I was assigned to work on the dust particle effect for the enemy stronghold to make it look like it was busy setting up more enemy troops to throw at the player. 

I was then tasked to add the block out props for level 4. I have pretty much copied the placement from my old level but with a few modifications to match the new terrain. There are now less enemy structures and normal structures than before. 

Currently, I am working on placing the new enemy spawners on my level and modifying them so whenever the player starts the level it would not immediately be flooded with enemies. 


Thursday, April 23, 2020

The Village Blog #11


For this week I mainly wanted to focus on cleaning up the UVs for my first house, texturing it, and see how it would look in a Unity scene. After taking my instructors advice I finally found a proper way to straighten my UVs and also get rid of those red/blue spots on my maps. 

After attempting the easy way which is making some cuts to the UV to help straighten it I realized that this method was not going to work. For some reason it stretches out the corner of each wall making it real hard to straighten it out. 

After a few attempts to straighten out my UV I then figured out that I just need to redo my UV once again but this time with the window separated. This has shown great results which as you can see on the top my UVs are all straighten out. 

I then ran into another issue where there was some parts in the mesh where I had to separate each quad and sew them back together to create a clean UV.  This process was simple once you know the steps needed to create a clean UV but considering I have multiple windows to UV out I expected it to be a time consuming process. 

Although the process was a bit tedious I am happy with the results that turned out. I can now proudly say that my UVs are clean and straight compared to how they were last time. 

Back Wall of the House

Front Wall of the House

Bottom Connector

Roof

This is the final product of the house. I made sure to use up all the room that I can on this UV tile to ensure better quality when it comes down to texturing in Substance Painter. 

I am also happy that the red/blue spots that were previously seen on my UVs are now gone now and barely visible. 

After creating the ID for my model and setting it up to export into Substance Painter, I sadly realized that my membership with them has sadly timed out. I looked up other texturing programs I could use and remembered what my instructor recommended one time which is Quixel. 

They have a free texturing program which is called Mixer but sadly since this program is fairly new it does not support baking which is essential when it comes down to IDing and texturing certain parts of the model. For now it looks like I might just focus on attempting one house and depending on how long it takes I might just jump in creating my environment right away in Unity. 


Thursday, April 16, 2020

The Village Blog #10

After getting some advice of my fellow peers and instructor I decided to use what they told me in action. As you can see above, it turns out to be a rough start than expected. This was my attempt to straighten out my UVs which did not work in the end. 

I followed the video that my instructor told me but it seems that I may have missed some crucial step when I was laying out the UVs. This is something that I need to review again with my fellow peers. 

In the meantime I tried another method which is manually straightening out the UVs but i did get a warning about it causing some stretching. So far when messing with a small piece of my modular set it did not cause stretching but it is a long process to accomplish. 

I was also given some advice that if my UVs turn out to be blue or red then I may have some problems when it comes to texturing. After seeing how much I needed to fix, I decided to take a bit of a break from Maya and jump into Unity to set up my environment. 

I remember from the beginning of the semester that a fellow peer recommended that if I were to set up my environment in Unity to use the latest version that they have which is 2019.3 which is full of new stuff such as High Definition Render Pipeline (HDRP). This allows for amazing lighting effects in your scene. 

After starting off with one of the tutorials I ran into a issue where my whole template scene that I downloaded was pink! After panicking and looking for other videos online I eventually found out that the tutorial that I was on covers this a minute later. 

It was simply just updating the materials that you have to Universal RP Materials. This will update some materials but won't for a few of them which is covered on how to update them separately in the video. 


You have to make sure that each material that you use is switched to this setting. Then with some modifications it will update the textures to normal instead of pink. 

For the terrain it is a different process in which you would have to create a new material. Just make sure to go to the terrain settings and replace the old material with the new one. 

After messing with the post processing effects this is the result that I have got. The lighting in this new version of Unity is amazing and this will definitely have a use in my environment. 

Next I decided I wanted some cartoon water in my scene so I decided to follow this tutorial by Brackeys. Although it was a constant back and forth with following with the changes that he makes, it was a relatively simple tutorial to follow. 

In the end this is the result that I had with my shader for the cartoon water. The bottom portion represents the texture that I wanted for the water while the top portion represents the vertex position of the water. 

This is the final result of my cartoon water which turned out to be pretty good. Not much was done in Maya since I did get burned out from constantly cleaning up the UVs but I made sure to make some progress on the Unity side. For next week hopefully I get the solution I need to fix my UVs but in case that doesn't happen I will continue on working on setting my environment in Unity. 


Thursday, April 9, 2020

The Village Blog #9

For this week I mainly finished up the UV process for all the houses and the few medium models that I plan to add to my environment in Unity. This process took longer than expected because there was at times where i had to re-adjust some models because the edges were not connected. 

Usually buildings that have some sort of railings on them are usually the toughest when it comes to UVing them. I did had a bit of trouble UVing the door frames on the top floor but it was easily fixed by highlighting where the problem was and merging the vertices. 

Modeling this part of the wall was a bit tricky at first because I also had to UV the inside of the balcony but after doing some proper cuts, it became easy to do in the end. 

I decided to put these two separate models in their own UV set since they were the most difficult to accomplish out of the whole house. 

The rest of the structures that were left were all put into one UV set mostly because of their simplicity. 

Strangely enough I had a ton of problems when UVing this lamp post especially on the part where the light shines. I then figured out the problem which is all vertices on the inside of the lamp post were connected. I fixed this by deleting all the faces that represented the light, then added a huge cube with some proper edge loops to ID for later. I find this to be the most easiest solution than going to each corner and disconnecting all the vertices. 

I then UVed the fence and then put it in a UV set with the lamp post. With this I have now assigned all the models with their proper UVs and put them in their sets. 

I've made sure to clean up my hierarchy to so for next time once I get around to IDing them I would have a easier time assigning each group their proper colors. If the ID process turns out to be faster than expected then I will quickly start the texturing process which will eventually lead up to exporting the sets into Unity. 


Wednesday, April 1, 2020

Castle On Wheels Blog #3

For this fourth sprint I was assigned 4 tasks in which three of them I have completed and the fourth one I had to finish up on the next sprint. My most rigorous task was the completion of the annotated map for level 8. Since the idea of the level was to give misdirection's to the player where the castle is going I made sure to create a path that always backtracks and goes up and down at times. Also since the level is a cave I made sure to draw out tight spaces that the player troops will have to go through. 

After finishing up the map I then started to visualize what I would need for my level. I had a hard time thinking of what I could put in the cave but thanks to Jake, who is our team leader, he gave me some more references to help me get a better picture which it did. 

The flow chart may look incredibly long for level 4 but it is all just a repeat of events such as encounter the enemy, attack, move forward, etc. This was one of my simple tasks to do this sprint but it was definitely a long and tedious task to accomplish. 

Finally, my final task was to resize my whole level since I have used multiple terrains to make it. For the end of the sprint I was able to resize the terrain and finished up placing the enemies and the navigation mesh in the next sprint. My next tasks for the next sprint is to get level 4 to be working properly and have it get balanced to make it a fun game play experience.