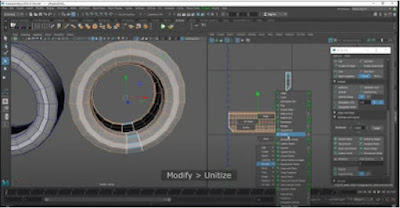
After getting some advice of my fellow peers and instructor I decided to use what they told me in action. As you can see above, it turns out to be a rough start than expected. This was my attempt to straighten out my UVs which did not work in the end.
I followed the video that my instructor told me but it seems that I may have missed some crucial step when I was laying out the UVs. This is something that I need to review again with my fellow peers.
In the meantime I tried another method which is manually straightening out the UVs but i did get a warning about it causing some stretching. So far when messing with a small piece of my modular set it did not cause stretching but it is a long process to accomplish.
I was also given some advice that if my UVs turn out to be blue or red then I may have some problems when it comes to texturing. After seeing how much I needed to fix, I decided to take a bit of a break from Maya and jump into Unity to set up my environment.
I remember from the beginning of the semester that a fellow peer recommended that if I were to set up my environment in Unity to use the latest version that they have which is 2019.3 which is full of new stuff such as High Definition Render Pipeline (HDRP). This allows for amazing lighting effects in your scene.
After starting off with one of the tutorials I ran into a issue where my whole template scene that I downloaded was pink! After panicking and looking for other videos online I eventually found out that the tutorial that I was on covers this a minute later.
It was simply just updating the materials that you have to Universal RP Materials. This will update some materials but won't for a few of them which is covered on how to update them separately in the video.
You have to make sure that each material that you use is switched to this setting. Then with some modifications it will update the textures to normal instead of pink.
For the terrain it is a different process in which you would have to create a new material. Just make sure to go to the terrain settings and replace the old material with the new one.
After messing with the post processing effects this is the result that I have got. The lighting in this new version of Unity is amazing and this will definitely have a use in my environment.
Next I decided I wanted some cartoon water in my scene so I decided to follow this tutorial by Brackeys. Although it was a constant back and forth with following with the changes that he makes, it was a relatively simple tutorial to follow.
In the end this is the result that I had with my shader for the cartoon water. The bottom portion represents the texture that I wanted for the water while the top portion represents the vertex position of the water.
This is the final result of my cartoon water which turned out to be pretty good. Not much was done in Maya since I did get burned out from constantly cleaning up the UVs but I made sure to make some progress on the Unity side. For next week hopefully I get the solution I need to fix my UVs but in case that doesn't happen I will continue on working on setting my environment in Unity.


No comments:
Post a Comment