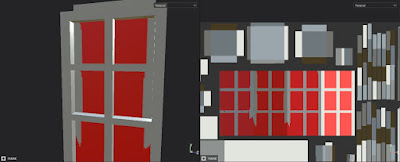
After getting my textures reviewed I decided to take everyone's suggestion and add a bit more detail to my houses. This is so the house will have some depth to it and not look too flat. The changes that I have made were to the wall and the roof.
It was a bit tricky adding some details to the second house but I eventually figured it out and manually painted the lines on my house. After touching up on the textures I now started to work on my scene to put my models in.
This is the final scene I have made for my houses. Any other model that you did not see me make belongs to Gigel who is a 3D artist from Poland. With his/her RPG package it definitely helped make my houses stand out in the beautiful environment!
Back shot of the houses
I made sure to rotate some terrain objects so it doesn't look too uniformed and a bit more natural.
I also recolored some textures from Gigel to make a flower garden and a road on the front.
My goals for this semester was to create a entire village with a game mechanic where you would have to go around and start collecting objects. I wanted to make a beautiful village that is inspired by a town in Reine, Norway.
As you could see here I planned to model out all these models. Now looking back I realized that this was a ton of work to do all in one semester with my skill set. It is crazy to believe that I thought I was able to model, texture, and UV 5 whole houses and a market!
This is the layout that I have originally thought of for my little village. Instead of believing that I could model all of this in one day I should have thought of something a bit more smaller. Then, once I have accomplished all the tasks that I needed to do I could then add more tasks depending on the amount of time I had.
Modeling all of these houses was the easy part but even though it was a simple task it took a ton of time getting the measurements right and giving them clean UVs. I also had to go back and clean up my models based on the reviews that my fellow peers gave me to improve them.
Modeling all of these houses was definitely a learning experience and it is thanks to my classmates and my professor. I could now say looking back on my models that I feel proud of how clean they look.
Same goes for my UVs. At first I thought I was doing it the right way by making cuts and unfolding them. However now that I am told what needs to change, making those improvements gave me confidence as a modeler.
As you can see in the picture above there is a clear difference in which UVs look the most clean.
I also got to learn more about the latest version of Unity that has a significant amount of improvements compared to the last version such as lighting.
As you can see here the lighting is beautiful in the new version of Unity since they have introduced a new feature which is the Universal Render Pipeline. Although this concludes the work I have done for my semester of college I plan to keep working on my village and eventually finish up the third house that I had to put aside for now. This has been a wonderful learning experience and I plan to utilize all that I have learned from my fellow peers and professor to create a beautiful environment for my level.


